Accept Your First Payment
Blawby uses Stripe Connect for payments. You don't enter bank account numbers in Blawby — you connect to Stripe, and Stripe handles the bank link, identity verification, and payouts. Your job in Blawby is to confirm the connection and configure trust vs. operating routing.
This page covers both checkpoints, plus how to send your first invoice from a matter.
The two Stripe Connect checkpoints
Blawby's onboarding shows two checkpoints in your dashboard. Both must clear before your firm can collect.
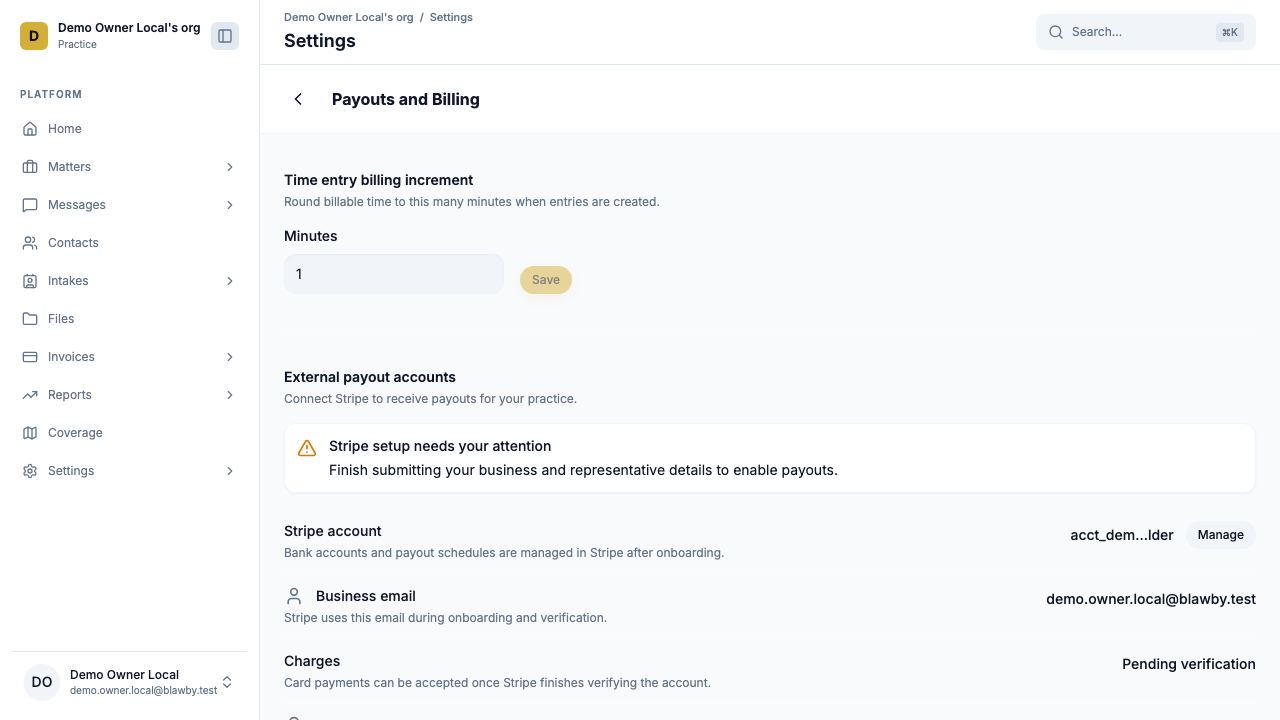
Checkpoint 1 — Link bank account
- Open Settings → Payments.
- Click Connect Stripe.
- You'll be redirected to Stripe's hosted onboarding to confirm:
- Business type and EIN
- Beneficial-owner / representative details
- The bank account you want payouts to land in
- When you complete Stripe's flow, you're redirected back. The first checkpoint shows Linked.
What's happening here. Stripe is creating a connected account for your firm. Blawby stores only the connected-account ID; sensitive bank details live with Stripe. This is what keeps Blawby out of PCI and banking-secrecy scope on your behalf.
Checkpoint 2 — Enable charges
Stripe verifies your identity and business documents in the background. This usually takes a few minutes for low-risk firms; occasionally longer if Stripe wants additional documentation.
When Stripe approves, the second checkpoint flips to Charges enabled. You can now:
- Send invoices that include a Stripe-hosted pay button
- Collect consultation fees on intake (if your template uses one)
- Generate pre-filled payment links
If charges stay pending, open the Stripe dashboard — Stripe will list any documents it still needs. You don't need to re-do anything in Blawby; the checkpoint clears automatically once Stripe approves.

Trust vs. operating routing
If your practice ever holds unearned client funds (retainers, settlement deposits, court filing-fee deposits), configure trust routing now — before you collect anything that should land in trust.
How Blawby keeps trust dollars whole
Blawby's fee model is built for trust compliance:
- Trust-eligible payments route to your trust account in full — Blawby never deducts fees from those dollars.
- Processing and platform fees are billed separately to a card you connect to your operating account.
This is the difference between Blawby and a generic processor that nets fees off the top: with Blawby, the trust account always receives the gross amount.
Setup
- Open Settings → Payments → Trust routing.
- Add the trust-account details Stripe should pay to. (You'll usually do this through Stripe's flow with a separate connected account or routing rule, depending on how your firm structures trust.)
- Add the operating-account card that fees will be billed to.
- Confirm. From this point, retainer and trust-eligible invoices route automatically.
If you don't hold client funds, leave trust routing off. All payments will land in your operating account.
Read the IOLTA Compliance Guide for more on how this fee model works.
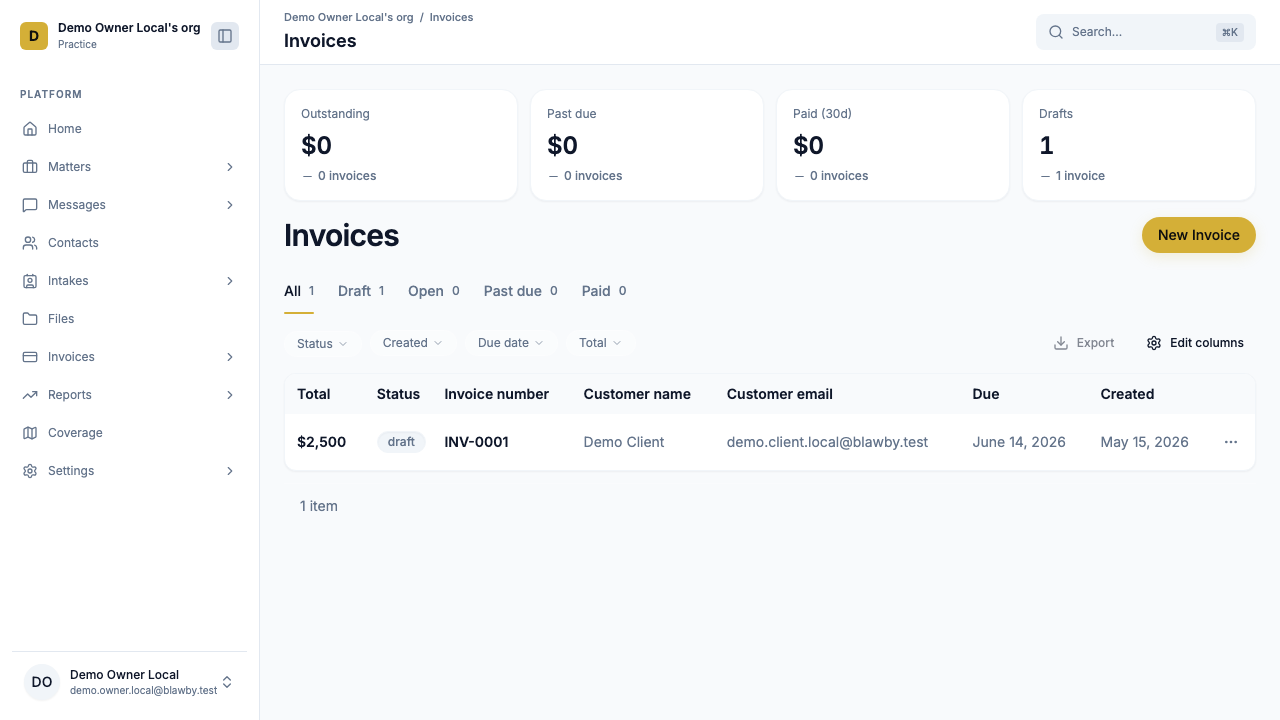
Send your first invoice from a matter
The simplest first-payment path: log a few minutes of time on a matter, then generate an invoice.
- Open or create a matter for the client. (See Matters Overview.)
- On the Work tab, add a time entry — start/end or duration, billable, with a short description.
- Switch to the Billing tab. The unbilled summary card shows your total billable hours plus any expenses.
- Click Generate invoice. Edit line items, add a flat fee or retainer draw if relevant, then Send.
- The client gets an email with a hosted Stripe pay link. They can pay by card or ACH without creating an account.
- The invoice flips to Paid automatically when payment clears. Notifications fire to your team via in-app, email, and push (OneSignal).
Pre-filled payment links
For quick collections that aren't a full invoice (consultation fees outside intake, donations, retainer top-ups), use a payment link:
https://blawby.com/your-firm-slug?amount=12500
The amount parameter is in cents. 12500 = $125.00. Generate the link from Settings → Payments → Payment link, then change the amount per request directly in the URL.
Common questions
The first checkpoint cleared but charges aren't enabled. Stripe is reviewing documents. Open your Stripe dashboard from Settings → Payments → View on Stripe — Stripe will list anything still needed. The Blawby checkpoint clears automatically once Stripe approves.
My first payout hasn't landed. Stripe's first payout for a new connected account commonly takes 7–14 days. Subsequent payouts follow Stripe's standard schedule (typically T+2 for cards, T+5 for ACH).
A client paid by ACH and the invoice is "Pending." ACH settlement takes a few business days. The invoice flips to Paid when Stripe confirms — no action needed from you.
I want to refund a payment. Open the invoice → Refund. Refunds use Stripe's refund API; the invoice records the refund and notifies the client.
Next: set up intake so payment-collection happens at the right point
Your intake template can require payment before submission, or after engagement acceptance, or not at all. Configure it to match your practice's free vs. paid consult policy.